
Regular maintenance and timely troubleshooting are essential for extending the life of your Roper dryer. This guide provides a comprehensive approach to diagnosing and resolving common issues, ensuring optimal performance and safety. By addressing problems early, you can prevent costly repairs and keep your dryer running efficiently. Whether your dryer won’t turn on, heat, or complete cycles, this guide offers step-by-step solutions to get your appliance back in working order.
1.1. Importance of Regular Maintenance
Regular maintenance is crucial for ensuring your Roper dryer operates efficiently and safely. It helps prevent common issues like clogged vents, faulty switches, and worn-out parts. By cleaning the lint filter, inspecting the venting system, and checking electrical connections, you can avoid breakdowns and reduce energy consumption. Maintenance also extends the appliance’s lifespan and prevents costly repairs. Additionally, it minimizes fire risks associated with lint buildup and ensures proper heating performance. Consistent upkeep allows you to identify and address minor problems before they escalate, keeping your dryer in optimal condition and enhancing reliability over time.
1.2. Common Issues in Roper Dryers
Roper dryers, like any appliance, can experience a range of common issues that affect performance. These include the dryer not turning on, which could stem from power supply problems or faulty switches. Heating issues often arise from clogged vents, malfunctioning gas valves, or a defective heating element. Unusual noises, such as rattling or squeaking, may indicate worn-out drum rollers or a jammed blower wheel. Additionally, control panel malfunctions and incomplete drying cycles are frequent concerns. Identifying these issues early can prevent further damage and ensure your dryer continues to function effectively.
1.3. Tools and Safety Precautions
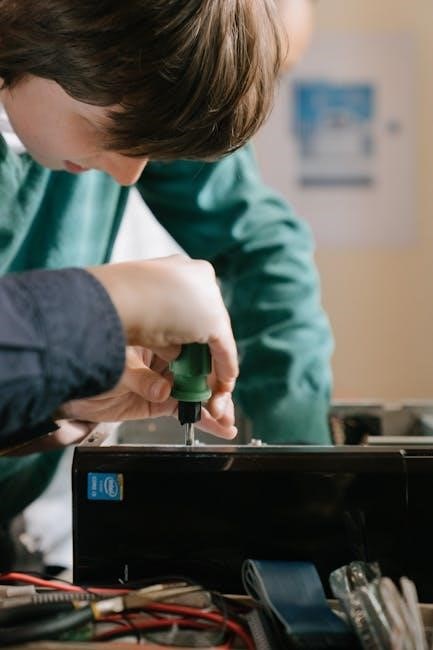
Troubleshooting your Roper dryer requires the right tools and adherence to safety guidelines. Essential tools include a multimeter for testing electrical components, screwdrivers for disassembling parts, and pliers for gripping small components. Always unplug the dryer from the power source before starting any repairs to avoid electrical shocks. Wear protective gear like gloves and safety glasses to prevent injuries. Ensure the dryer is cool and the drum is empty. Never bypass safety features like the door switch, as this can lead to accidents. Consult your dryer’s manual for specific instructions and know when to call a professional if the issue is beyond your expertise.

Dryer Not Turning On
If your Roper dryer won’t turn on, check the power supply, door switch, and thermal fuse. These are common issues that can prevent it from starting.
2.1. Checking the Power Supply
First, ensure the dryer is properly plugged in and the outlet is functioning. Check if a circuit breaker has tripped or a fuse has blown. Verify that the dryer is receiving 220 volts, as it requires this voltage to operate. If using an extension cord, ensure it’s rated for the dryer’s power needs. A faulty or loose power cord can also prevent the dryer from turning on. Always handle electrical components with caution and consider consulting a professional if unsure.
2.2. Inspecting the Door Switch
The door switch is a critical safety feature that prevents the dryer from running when the door is open. To inspect it, ensure the dryer is unplugged for safety. Locate the switch, typically found near the door latch. Use a multimeter to test for continuity; if it fails, the switch is faulty. Visually check for worn or damaged contacts and ensure the switch is properly aligned. If the switch is malfunctioning, the dryer won’t start, even if other components are functioning. Replace the switch if necessary, and always follow safety guidelines when working with electrical components.
2.3. Testing the Thermal Fuse
The thermal fuse is a safety device that trips if the dryer overheats, preventing further damage. To test it, unplug the dryer and locate the fuse, typically near the exhaust vent or heating element. Use a multimeter to check for continuity; if there’s none, the fuse is blown. A blown thermal fuse is often caused by a clogged vent, faulty heating element, or malfunctioning thermostat. Before replacing the fuse, address the underlying issue to prevent recurrence. Always ensure the dryer is cool and unplugged before performing this test to avoid injury or further damage.
2.4. Examining the Start Switch
The start switch is a critical component that initiates the dryer’s operation. If the dryer fails to start, the switch may be faulty. To examine it, unplug the dryer for safety. Locate the switch, usually on the control panel or behind the start button. Use a multimeter to test for continuity when the switch is pressed; no continuity indicates a faulty switch. A malfunctioning start switch is a common issue and can be replaced with a compatible part. Always ensure the dryer is unplugged before performing this test to avoid electrical hazards or further damage.
2.5. Verifying the Timer Functionality
The timer is essential for controlling the dryer’s cycle durations. If the dryer fails to start or complete cycles, the timer may be malfunctioning. To verify functionality, ensure the timer is set correctly and cycles progress as expected. If the timer appears stuck or unresponsive, check for internal wear or electrical issues. A faulty timer can prevent the dryer from operating properly. Testing the timer with a multimeter for continuity can confirm if it needs replacement. Always unplug the dryer before performing such checks to ensure safety and avoid electrical hazards.
2.6. Checking the Power Cord
A faulty power cord can prevent your Roper dryer from turning on. Inspect the cord for visible damage, such as cuts, burns, or fraying. Ensure it is securely plugged into both the dryer and the electrical outlet. If the cord is damaged, replace it immediately. Additionally, check the circuit breaker or fuse box to confirm the dryer’s circuit hasn’t tripped or blown. A loose connection or tripped breaker can mimic a faulty cord. Always unplug the dryer before handling the cord to avoid electrical shock. If the issue persists, consult a professional for further assistance.

Dryer Not Heating
If your Roper dryer isn’t producing heat, it could indicate issues with the gas valve, heating element, or venting system. Addressing these problems promptly prevents further damage and ensures energy efficiency. Faulty components or blockages can cause the dryer to malfunction, requiring a systematic approach to diagnose and resolve the issue effectively.
3.1. Gas Valve Coil Issues
A faulty gas valve coil is a common issue in Roper dryers that fail to heat. The gas valve coil regulates gas flow to the burner. If it malfunctions, the dryer won’t produce heat. Symptoms include no heat during cycles or intermittent heating. To diagnose, ensure the gas supply is on and check for blockages in the gas line. Testing the coil’s electrical continuity with a multimeter can confirm if it’s defective. Replacing the gas valve coil is typically the solution. Always ensure proper installation and safety precautions when handling gas components to avoid hazards.
3.2. Faulty Heating Element
A faulty heating element is a common cause of a Roper dryer not heating. The heating element is responsible for generating heat during cycles. If it fails, the dryer may run but won’t produce heat. To diagnose, check for visible damage, such as breaks or burn marks, on the element. Use a multimeter to test for continuity; a lack of continuity indicates the element is defective. Replacement is typically required in such cases. Always unplug the dryer before performing inspections or repairs. Addressing this issue promptly ensures safe and efficient operation of your appliance.
3.3. Clogged Dryer Vent
A clogged dryer vent is a common issue that can prevent your Roper dryer from heating properly. Over time, lint and debris accumulate in the vent, restricting airflow and causing poor performance. Symptoms include extended drying times, clothes feeling damp after a cycle, or the dryer overheating. To resolve this, inspect and clean the vent thoroughly. Disconnect the vent from the dryer and use a brush or vacuum to remove blockages. Ensure the vent is free of kinks and properly secured. Regular cleaning prevents lint buildup and reduces the risk of fires, ensuring efficient and safe operation of your dryer.
3;4. Malfunctioning Selector Switch
A malfunctioning selector switch can disrupt your Roper dryer’s ability to heat or function properly. The selector switch allows you to choose between different drying cycles and heat settings. If it fails, the dryer may not heat or may not start at all. Symptoms include the dryer not responding to cycle selections or failing to switch between heat settings. To diagnose, unplug the dryer and inspect the switch for visible damage or wear. Use a multimeter to test for continuity or resistance. If faulty, replace the selector switch with a compatible part to restore proper functionality and ensure safe operation.
3.5. Igniter or Glow Bar Problems
A faulty igniter or glow bar is a common issue in gas dryers, preventing the burner from lighting and thus no heat. If the igniter doesn’t glow or the glow bar doesn’t ignite the gas, the dryer won’t heat. Symptoms include the dryer running but not producing heat. To diagnose, inspect the igniter for breaks or wear. Use a multimeter to test for continuity. If damaged, replace the igniter or glow bar with a compatible part. Ensure proper installation and test the dryer to confirm the heating function is restored. Regular inspection can prevent such issues from recurring.

Unusual Noises
Rattling, scraping, or squeaking sounds may indicate objects in the drum or worn-out parts like rollers or glides. Inspect and replace damaged components to ensure smooth operation.
4.1; Rattling or Scraping Sounds
Rattling or scraping noises in your Roper dryer can be alarming but are often due to simple, fixable issues. Foreign objects like coins or zippers may be causing the racket. Pause the dryer and check for items lodged in the drum or rollers. Worn-out drum rollers or damaged drum glides are another common culprit. Inspect these parts for wear and replace them if necessary. Additionally, debris or lint buildup in the drum or venting system can contribute to unusual sounds. Regular cleaning and maintenance can prevent these issues. Addressing these problems promptly ensures smoother operation and extends the dryer’s lifespan.
4.2. Squeaking Noises
Squeaking noises in your Roper dryer are typically caused by worn or damaged components within the drum assembly. Drum glides, which support the drum, often wear out over time and can produce a squeaking sound. Similarly, the idler pulley, responsible for tensioning the belt, may also cause noise if it’s worn or misaligned. To resolve this, inspect and replace any worn drum glides or idler pulleys. Lubricating moving parts can also help reduce friction and eliminate squeaking. Regular maintenance, such as cleaning and checking for wear, can prevent these issues from arising. Addressing squeaking noises promptly ensures quieter operation and prevents further damage.
4.3. Humming Noise from the Motor
A humming noise from the motor in your Roper dryer typically indicates a mechanical issue. This sound can be caused by a faulty or failing motor, misaligned pulleys, or a jammed blower wheel. Over time, wear and tear on internal components can lead to such noises. To address this, inspect the blower wheel for obstructions and ensure proper alignment of the pulleys. If the motor is malfunctioning, it may require replacement. In some cases, a humming noise can also signify a failing bearing or overloaded motor. Regular maintenance and prompt repairs can prevent further damage and restore quiet operation.
4.4. Jammed Blower Wheel
A jammed blower wheel can cause unusual noises or disrupt airflow in your Roper dryer. This issue often arises from lint buildup, debris, or foreign objects obstructing the wheel. To resolve this, disconnect the dryer from power and inspect the blower wheel housing. Clean out any blockages and ensure the wheel rotates freely. If the wheel is damaged or worn, replacement may be necessary. Regular cleaning of the venting system and drum can prevent such issues. Addressing a jammed blower wheel promptly will restore proper airflow and eliminate noise, ensuring efficient drying performance.

Issues with the Drum
Drum issues in Roper dryers often involve problems like the drum not turning, worn-out drum rollers, or damaged drum glides. These problems can cause loud noises or uneven drying. Regular maintenance is key to preventing such issues, as debris and wear can disrupt drum functionality. Addressing these problems promptly ensures smooth operation and prevents further damage to your dryer. Always check for obstructions and inspect the drum components for signs of wear or damage to maintain optimal performance and extend the appliance’s lifespan.
5.1. Drum Not Turning
A drum that won’t turn in your Roper dryer can be caused by a broken drum belt, faulty motor, or issues with the idler pulley. Check for blockages like clothes or debris tangled around the drum rollers. Inspect the drum belt for signs of wear or breakage and replace it if necessary. Additionally, ensure the motor is functioning properly and the pulley system is aligned. If the drum glides or rollers are damaged, they may need replacement. Addressing these issues promptly will restore the drum’s rotation and ensure proper drying performance. Regular maintenance can help prevent such problems from occurring.
5.2. Worn-out Drum Rollers
Worn-out drum rollers can cause unusual noises, such as scraping or thumping sounds, and may lead to poor drying performance. Over time, the rollers can wear down due to friction and heavy use. Inspect the rollers for signs of wear, such as cracks or excessive play. If damaged, they should be replaced to ensure smooth drum rotation. Lubricating the rollers can sometimes resolve minor issues, but if they are severely worn, replacement is the best solution. Addressing worn drum rollers promptly will prevent further damage to your Roper dryer and maintain its efficiency.
5.3. Damaged Drum Glides
Damage to drum glides can lead to uneven drying, unusual noises, or even damage to clothes. Glides wear out over time, causing friction and potential scraping sounds. Inspect the glides for excessive wear, cracks, or debris buildup. Cleaning them may resolve minor issues, but severely damaged glides require replacement. Regular maintenance, such as lubricating or replacing worn glides, ensures smooth drum operation and prevents further damage. Addressing damaged drum glides promptly will restore your Roper dryer’s performance and prevent unnecessary wear on other components.

Problems with Controls and Settings
Malfunctioning controls or incorrect settings can disrupt your dryer’s operation. Check for non-responsive buttons, incorrect cycle selections, or faulty sensors. Resetting the dryer or testing components may resolve issues. Ensure settings align with load size and fabric type for optimal performance. If problems persist, consider replacing defective control panel parts or sensors to restore functionality.
6.1. Non-Responsive Control Panel
If your Roper dryer’s control panel is unresponsive, start by ensuring the dryer is properly plugged in and receiving power. Check for tripped circuit breakers or blown fuses. Next, inspect the control panel for visible damage or worn-out buttons. Clean the panel to remove any debris that might interfere with functionality. If the issue persists, test the electrical connections and components using a multimeter. A faulty user interface or control board may need replacement. In some cases, resetting the dryer or updating its software can resolve the problem. Always refer to your model’s repair manual for specific guidance.
6.2. Incorrect Cycle Settings
If your Roper dryer’s control panel is unresponsive, start by ensuring the dryer is properly plugged in and receiving power. Check for tripped circuit breakers or blown fuses. Next, inspect the control panel for visible damage or worn-out buttons. Clean the panel to remove any debris that might interfere with functionality. If the issue persists, test the electrical connections and components using a multimeter. A faulty user interface or control board may need replacement. In some cases, resetting the dryer or updating its software can resolve the problem. Always refer to your model’s repair manual for specific guidance.
6.3. Faulty Moisture Sensors
Faulty moisture sensors can prevent your Roper dryer from detecting when clothes are dry, leading to incomplete cycles or over-drying. Symptoms include clothes feeling damp or overly hot. To troubleshoot, ensure the sensor bars inside the drum are clean and free of lint. Use a soft brush or cloth to wipe them down. If the sensors are damaged or corroded, they may need replacement. Additionally, check the dryer’s settings to ensure the correct cycle is selected. If issues persist, test the sensor’s electrical continuity with a multimeter. Faulty sensors can mimic other problems, so accurate diagnosis is essential for proper repair.
Failure to Complete Cycles
Power interruptions, faulty timers, or a clogged lint filter can cause your Roper dryer to stop mid-cycle. Always check these common issues first to restore functionality.
7.1. Power Interruptions
A power interruption can prevent your Roper dryer from completing a cycle. Check if a household circuit breaker has tripped or a fuse has blown. Ensure the dryer is properly plugged into a functioning outlet. If the issue persists, test the outlet with a multimeter to confirm voltage. Power surges or outages may also damage the control board, requiring replacement. Always reset the dryer after restoring power and verify cycle functionality. Regularly inspecting the power cord and connections can prevent such interruptions. For recurrent issues, consider consulting a licensed electrician to ensure your home’s electrical system is stable.
7.2. Faulty Timer or Cycling Issues
A faulty timer or cycling issues can cause your Roper dryer to stop mid-cycle or fail to advance through settings. Check if the timer is properly engaged and test its electrical connections. Use a multimeter to verify continuity in the timer’s circuit. If the timer is defective, it may need replacement. Additionally, ensure the cycle selector switch is functioning correctly, as misalignment or wear can disrupt the drying process. Resetting the dryer or checking for software updates may resolve intermittent cycling problems. If issues persist, consult a professional to diagnose and repair the timer or control system.
7.3. Clogged Lint Filter
A clogged lint filter can significantly impede your Roper dryer’s performance, leading to incomplete drying cycles or poor airflow. Regularly clean the lint filter after each use to ensure proper ventilation. Remove any accumulated debris, and inspect the filter for tears or damage. Replace the filter if necessary. A blocked filter forces the dryer to work harder, increasing energy consumption and wear on internal components. Cleaning this simple part is a quick fix that can restore efficiency and prevent more serious issues from developing over time.
Advanced Troubleshooting Steps
For persistent issues, advanced troubleshooting involves checking fault codes, using a multimeter to test components, and replacing defective parts like sensors or electrical elements to restore functionality.
8.1. Checking Fault Codes
Checking fault codes is a crucial step in advanced troubleshooting. Most modern Roper dryers display specific error codes that indicate the source of the problem. These codes can be found in the user manual or on the manufacturer’s website. Common codes include those for issues like faulty sensors, malfunctioning heating elements, or communication errors between components. By referencing these codes, you can identify the exact issue and take targeted repair actions, saving time and effort. Always ensure you have the correct model number to access accurate information.
8.2. Using a Multimeter for Testing
A multimeter is an essential tool for diagnosing electrical issues in your Roper dryer. It allows you to test components like fuses, heating elements, and switches for continuity, voltage, and resistance. Start by setting the multimeter to the appropriate function (continuity or resistance for fuses and switches, voltage for live circuits). Always disconnect power before testing. Use the multimeter to verify if components are functioning correctly. For example, a faulty thermal fuse may show no continuity, while a working heating element should display a low resistance reading. Refer to your dryer’s wiring diagram or user manual for specific testing procedures.
8.3. Replacing Defective Parts
Replacing defective parts is often the final step in resolving issues with your Roper dryer. Always identify the faulty component using diagnostic tests before purchasing a replacement. Ensure the new part matches the original specifications to guarantee compatibility. Disconnect power and follow safety precautions to avoid injury or further damage. Use tools like a screwdriver to access and remove the defective part, then install the replacement securely. Reassemble the dryer carefully and test its operation to confirm the repair. If unsure, consult the user manual or seek professional assistance to ensure the repair is done correctly and safely.
DIY Repair Tips
Empower yourself to tackle common Roper dryer issues with basic tools and knowledge. Clean vents, replace fuses, and inspect switches to restore function. Save money and time by addressing problems early, ensuring safety and efficiency. DIY repairs can often resolve issues like no heat or unusual noises, extending your dryer’s lifespan. Always follow safety guidelines and consult your manual for specific instructions. Simple fixes can make a big difference, keeping your dryer running smoothly for years to come.
9.1. Replacing the Thermal Fuse
Replacing the thermal fuse is a straightforward DIY repair that can restore your Roper dryer’s heating function. Start by unplugging the dryer to ensure safety. Locate the thermal fuse, typically found near the heating element or on the blower housing. Use a screwdriver to remove the mounting screws and gently pull out the fuse. Test it with a multimeter to confirm it’s faulty. If damaged, install a new fuse, ensuring it’s securely fastened. Reassemble the dryer and test it to verify the heat is working. Always refer to your dryer’s manual for specific instructions and safety precautions during the replacement process.
9.2. Fixing the Door Switch

Fixing the door switch on your Roper dryer is crucial for safety and proper operation. Start by unplugging the dryer to avoid electrical hazards. Locate the door switch, usually found near the door latch. Inspect it for signs of wear or misalignment. If the switch is damaged, replace it by disconnecting the wires and installing a new one. If it’s simply misaligned, adjust it to ensure proper contact when the door is closed. Test the dryer afterward to confirm it starts and runs smoothly. Regularly cleaning the door latch and switch can prevent future issues, ensuring reliable performance and safety.
9.3. Cleaning the Dryer Vent
Cleaning the dryer vent is essential for maintaining efficiency and safety. A clogged vent can cause poor performance, increased energy bills, and fire hazards. Start by disconnecting the vent from the dryer and exterior vent. Use a dryer vent brush or vacuum to remove lint and debris from the entire length of the vent. Ensure all connections are secure after cleaning. Regular cleaning prevents blockages and ensures proper airflow, helping your dryer function optimally. Additionally, inspect the exterior vent to ensure it opens and closes correctly, allowing moisture to escape freely.
When to Call a Professional
If you encounter major electrical issues, complex mechanical failures, or need warranty repairs, it’s best to call a professional. They can safely diagnose and fix advanced problems, ensuring your Roper dryer operates correctly and efficiently.
10.1. Major Electrical Issues
Major electrical issues, such as faulty wiring, tripped circuit breakers, or blown fuses, require professional attention. If your Roper dryer won’t turn on or run due to electrical faults, a licensed technician can safely diagnose and repair the problem, ensuring your appliance functions properly. Electrical problems can be dangerous, so it’s crucial to avoid DIY attempts and seek expert help to prevent further damage or safety hazards. Professional intervention guarantees a reliable and safe solution for your dryer’s electrical system.

10.2. Complex Mechanical Failures
Complex mechanical failures, such as a jammed blower wheel or faulty drum rollers, often require specialized tools and expertise to resolve. These issues can lead to unusual noises, poor performance, or complete system shutdown. Attempting DIY repairs for such problems may worsen the damage or pose safety risks. A professional technician can accurately diagnose and repair intricate mechanical components, ensuring your Roper dryer operates safely and efficiently. Addressing these failures promptly prevents further degradation and extends the appliance’s lifespan. Always consult a qualified technician for reliable solutions to complex mechanical issues.
10.3. Warranty and Insurance Considerations
Before attempting repairs, check if your Roper dryer is still under warranty, as this can save you significant costs. Review the warranty terms to determine if the issue is covered. Additionally, consult your home insurance policy to see if it includes appliance repairs. If the warranty has expired or the problem isn’t covered, contact the manufacturer for potential support or parts replacement options. Keep records of all communications and repairs for future reference. Understanding your warranty and insurance coverage ensures you make informed decisions and avoid unnecessary expenses.
Leave a Reply
You must be logged in to post a comment.