Costco Gluten-Free Pizza Cooking Instructions: A Comprehensive Guide
This guide provides detailed instructions for cooking Costco’s gluten-free pizzas, ensuring a delightful experience with perfectly crispy crusts and wonderfully melted cheese every time!
Costco has become a go-to destination for those seeking convenient and affordable gluten-free pizza options, catering to a growing demand for dietary alternatives. Currently, Costco primarily features two popular gluten-free pizza varieties: the Sabatasso Four-Cheese Gluten-Free Pizza and the Kirkland Signature Cauliflower Crust Pizza.
The Sabatasso option boasts a classic blend of cheeses – Mozzarella, Fontina, Parmesan, and Asiago – on a thin, crispy gluten-free crust. Meanwhile, the Kirkland Signature pizza offers a lighter, vegetable-forward experience with its cauliflower-based crust. Both options provide a delicious and accessible way to enjoy pizza without gluten.
Understanding the nuances of cooking these pizzas is key to unlocking their full potential, as gluten-free crusts often require slightly different techniques than traditional wheat-based crusts. This guide will equip you with the knowledge to achieve optimal results, ensuring a satisfying and flavorful meal.
Understanding Gluten-Free Crust Challenges
Gluten-free crusts, while offering a fantastic alternative for those with dietary restrictions, present unique cooking challenges compared to traditional pizza crusts. The absence of gluten, a protein providing elasticity and structure, often results in a more delicate and potentially fragile crust. This means gluten-free pizzas can be prone to becoming soggy or lacking the desired crispness.
Costco’s gluten-free pizzas, particularly the cauliflower crust variety, require careful attention to temperature and cooking time. Cauliflower crusts, in particular, contain more moisture, increasing the risk of a soft, undercooked base. Achieving a perfectly crispy texture necessitates precise oven temperatures and potentially, alternative cooking methods like using an air fryer.
Proper preheating and strategic placement within the oven are crucial. Understanding these challenges allows for adjustments to ensure a structurally sound and flavorful pizza experience.
Optimal Cooking Methods
Achieving the best results with Costco’s gluten-free pizzas involves choosing between traditional oven baking and utilizing the speed and crisping power of an air fryer!
Oven Baking: Traditional Approach
Oven baking remains a popular and reliable method for cooking Costco’s gluten-free pizzas, delivering consistently satisfying results. The key to success lies in understanding the importance of preheating and selecting the appropriate temperature. Generally, a temperature range of 425°F (220°C) to 450°F (232°C) is recommended, depending on the specific pizza variety.
Baking time typically falls between 10 to 16 minutes, but close monitoring is crucial to prevent burning. You have the option of placing the frozen pizza directly on the oven rack for maximum crispness, or using a baking sheet for easier handling and cleanup. However, using a baking sheet may slightly reduce crust crispiness. Remember, preheating is absolutely crucial for a crispy crust and evenly cooked toppings!
Some sources suggest a lower temperature of 350°F for a longer bake time of 20-25 minutes, but higher temperatures generally yield better results with these pizzas.
Preheating the Oven: Importance & Temperature (425°F/220°C ー 450°F/232°C)
Preheating your oven is arguably the most critical step in achieving a perfectly cooked Costco gluten-free pizza. A fully preheated oven ensures the crust begins to cook immediately, promoting even heat distribution and preventing a soggy bottom. Aim for a temperature between 425°F (220°C) and 450°F (232°C); 450°F is often preferred for optimal crispness.
Allow sufficient time for the oven to reach the desired temperature – typically 15-20 minutes. Using an oven thermometer is recommended to verify accuracy. Starting with a cold oven will result in uneven cooking and a less-than-ideal texture. The high heat helps to quickly melt the cheese and create a golden-brown, crispy crust, essential for enjoying these gluten-free options to their fullest.
Baking Time Guidelines (10-16 Minutes)
Generally, Costco gluten-free pizzas require a baking time of 10 to 16 minutes, but this can vary depending on your oven and the specific pizza variety. Begin checking for doneness around the 10-minute mark. Look for a golden-brown crust and bubbling, melted cheese. The Sabatasso Four-Cheese typically benefits from the longer end of this range – 12 to 16 minutes at 450°F.
Keep a close watch during the final few minutes to prevent burning. Baking time can also be influenced by whether you use a baking sheet or place the pizza directly on the rack. Remember, these are guidelines; visual cues are your best indicator of readiness. A slightly longer bake can ensure a truly crispy crust!
Using a Baking Sheet vs. Direct Rack Placement
When baking Costco’s gluten-free pizza, you have two main options: using a baking sheet or placing the pizza directly on the oven rack. A baking sheet provides a safer, easier transfer and can help contain any potential cheese drips, but may result in a slightly less crispy crust. The sheet acts as an insulator, slowing down the heating of the bottom crust.
Direct rack placement, however, allows for more even heat circulation, promoting a crispier crust. Be cautious when using this method, as it requires careful handling of the hot pizza. Regardless of your choice, preheating is crucial! Ensure your oven is fully heated before adding the pizza for optimal results.
Air Fryer Cooking: For Extra Crispiness
For those seeking an exceptionally crispy crust, the air fryer is an excellent alternative to oven baking when preparing Costco’s gluten-free pizzas; The rapid air circulation technology delivers superior results, mimicking the effect of a professional pizza oven. This method is particularly effective for gluten-free crusts, which can sometimes lack the structural integrity of traditional dough.
The air fryer’s concentrated heat quickly cooks the pizza, ensuring a golden-brown and delightfully crunchy base. Remember to avoid overcrowding the air fryer basket; cook one pizza at a time for best results. This ensures even cooking and maximum crispiness. It’s a fantastic way to enjoy a quick and satisfying gluten-free meal!
Air Fryer Temperature (375°F/190°C)
When utilizing an air fryer to cook your Costco gluten-free pizza, setting the temperature to 375°F (190°C) is crucial for achieving optimal results. This temperature strikes a perfect balance, ensuring the crust becomes beautifully crispy without burning the cheese or toppings. Lower temperatures may result in a soggy crust, while higher temperatures could lead to uneven cooking and a potentially charred pizza.
Consistent temperature control is key to a successful air fryer pizza. Preheating the air fryer for a few minutes before adding the pizza is also recommended for even more consistent cooking. Remember to check the pizza periodically during the cooking process to monitor its progress and adjust the cooking time if needed, ensuring a perfectly cooked and delicious gluten-free pizza!
Air Fryer Cooking Time (9-11 Minutes)
For optimal crispiness and perfectly melted cheese, the recommended cooking time for Costco gluten-free pizza in an air fryer is between 9 and 11 minutes. This timeframe allows the crust to become delightfully crunchy while ensuring the toppings are heated through and the cheese is bubbly and golden brown. However, cooking times can vary slightly depending on your specific air fryer model.
It’s essential to check the pizza’s progress around the 9-minute mark. Look for a golden-brown crust and fully melted cheese. If needed, add an extra minute or two of cooking time. Avoid overcooking, as this can lead to a dry or burnt pizza. Consistent monitoring during the final minutes will guarantee a perfectly cooked, satisfying gluten-free meal!
Specific Pizza Varieties & Instructions
Costco offers diverse gluten-free pizza options, including Sabatasso Four-Cheese and Kirkland Signature Cauliflower Crust, each requiring slightly adjusted cooking parameters for best results!
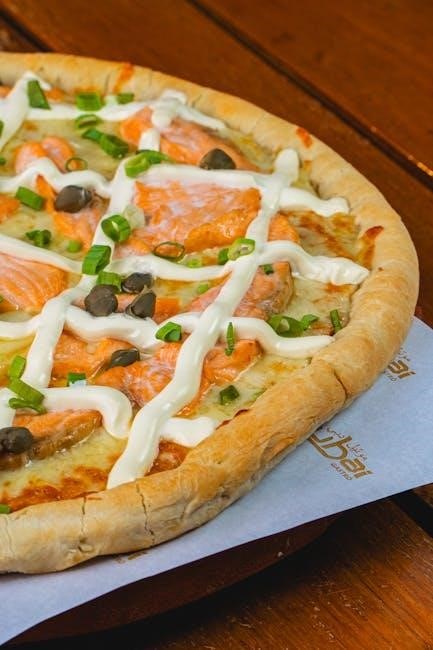
Sabatasso Four-Cheese Gluten-Free Pizza
The Sabatasso Four-Cheese Gluten-Free Pizza is a popular choice, boasting a delicious blend of Mozzarella, Fontina, Parmesan, and Asiago cheeses atop a thin, crispy crust. This frozen, three-pack option, typically priced around $21.14 at Costco, delivers a convenient and flavorful gluten-free meal.
To achieve optimal cooking results, preheat your oven to 450°F (232°C). Remove the pizza from its packaging and place it directly on the center rack of your oven. A baking sheet isn’t strictly necessary, allowing for maximum crust crisping. The recommended baking time is 12-16 minutes, or until the crust is golden brown and the cheese is fully melted and bubbly.
Keep a close watch during the final few minutes to prevent burning. This pizza cooks relatively quickly, so attentive monitoring is key to a perfect bake. Enjoy this cheesy delight immediately after removing it from the oven!
Cheese Blend Details (Mozzarella, Fontina, Parmesan, Asiago)
Sabatasso Four-Cheese Gluten-Free Pizza distinguishes itself through its carefully selected cheese blend, creating a complex and satisfying flavor profile. The foundation is classic Mozzarella, providing a familiar, milky base and excellent melt. Fontina adds a nutty, slightly sweet dimension, enhancing the overall richness.
A generous grating of Parmesan contributes a sharp, savory note and a delightful textural contrast. Finally, Asiago, with its robust and slightly tangy flavor, completes the quartet, adding depth and complexity. This combination ensures each bite is a harmonious blend of tastes and textures.
The quality of these cheeses is evident in the pizza’s overall taste, making it a standout gluten-free option. The blend melts beautifully, creating a gooey and flavorful topping.
Recommended Cooking Time (12-16 Minutes at 450°F)
For the Sabatasso Four-Cheese Gluten-Free Pizza, achieving optimal results hinges on precise cooking time and temperature. A preheated oven set to 450°F (232°C) is crucial for a crispy crust and fully melted cheese. Begin checking the pizza around 12 minutes, but allow it to bake for up to 16 minutes, depending on your oven’s performance.
Look for a golden-brown crust and bubbling, slightly browned cheese as indicators of doneness. The crust should be firm enough to support the toppings without being overly hard. Consistent monitoring is key, as ovens vary.
Remember, these times are guidelines; adjust as needed to suit your oven. A slightly longer bake time can ensure the cheese is perfectly melted and the crust is delightfully crisp.
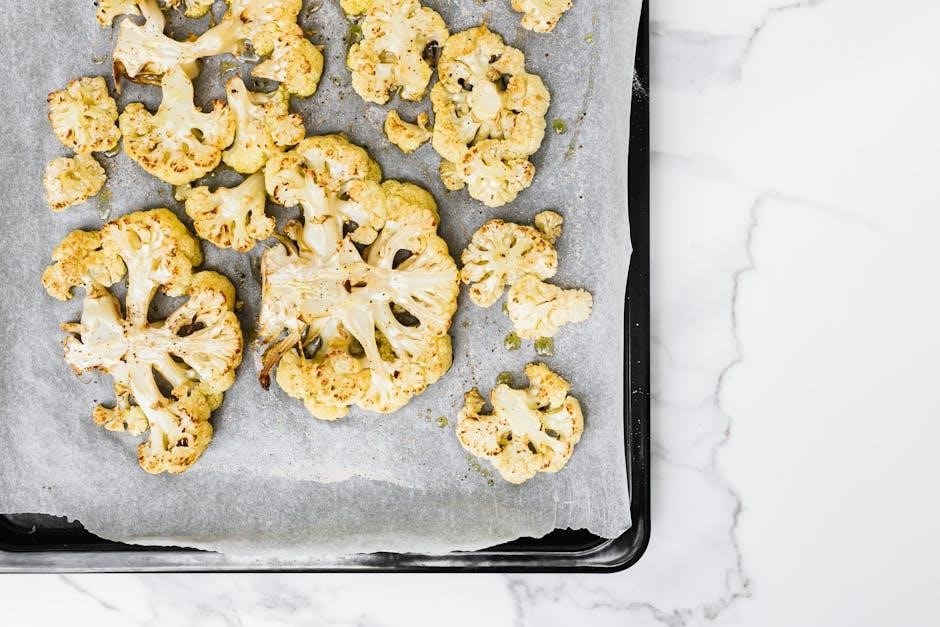
Kirkland Signature Cauliflower Crust Pizza
The Kirkland Signature Cauliflower Crust Pizza presents unique cooking considerations due to its delicate, vegetable-based crust. Unlike traditional gluten-free crusts, cauliflower crusts require a slightly different approach to ensure optimal texture and prevent sogginess.

Pay close attention to preheating your oven thoroughly; A consistent temperature is vital for achieving a crispy base. While specific temperatures may vary, generally, baking at 425°F to 450°F yields the best results. Monitor closely, as cauliflower crusts can burn more easily than wheat-based or traditional gluten-free options.
Experimentation may be needed to find the sweet spot for your oven, but starting with around 12-15 minutes is a good baseline.
Unique Considerations for Cauliflower Crust
Cauliflower crusts differ significantly from traditional pizza bases, demanding specific attention during preparation. Their higher moisture content is the primary challenge, often leading to a softer, potentially soggy texture if not addressed correctly.

Pre-baking the crust briefly – around 5-7 minutes – can help mitigate this issue by releasing some excess moisture. However, Costco’s pre-made cauliflower crusts are formulated to minimize this need. Direct rack placement, while sometimes recommended for crispier results with other pizzas, isn’t generally advised for cauliflower crusts due to their fragility.
Using parchment paper underneath provides extra support and prevents sticking. Careful monitoring is crucial; the crust browns faster than traditional dough, so watch closely to avoid burning.
Optimal Baking Temperature & Time
Achieving the perfect bake for Costco’s Kirkland Signature Cauliflower Crust Pizza requires precise temperature and timing. A preheated oven is absolutely essential, ideally set to 425°F (220°C) to 450°F (232°C), depending on your oven’s calibration and desired crispness.
Generally, a baking time of 12-15 minutes yields excellent results, but always visually assess the pizza. Look for a golden-brown crust and fully melted, bubbly cheese. Starting with 12 minutes and checking frequently is recommended, adding a minute or two as needed.
Remember, oven temperatures can vary, so these times are guidelines. Using a baking sheet is preferable to direct rack placement for this crust, providing support and preventing potential burning. Consistent monitoring is key to a perfectly cooked pizza!

Tips for Perfect Results
For a truly exceptional pizza, focus on a crispy crust, evenly melted cheese, and proper cooling before slicing for the best flavor and texture!
Achieving a Crispy Crust
Achieving a crispy crust with Costco’s gluten-free pizzas requires attention to detail, as gluten-free crusts can be more delicate than traditional ones. Preheating your oven to the recommended temperature – between 425°F and 450°F (220°C ー 232°C) – is absolutely crucial.
Consider using a baking sheet, but for enhanced crispiness, placing the pizza directly on the oven rack can yield superior results. Utilizing an air fryer at 375°F (190°C) for 9-11 minutes is another excellent method for maximizing crust crispness.
Avoid overcrowding the oven, as this can hinder proper air circulation and lead to a soggy crust. Monitoring the pizza closely during the final few minutes of baking will help prevent burning while ensuring optimal crispness. Remember, a slightly longer baking time can often make all the difference!
Ensuring Evenly Melted Cheese
To guarantee beautifully and evenly melted cheese on your Costco gluten-free pizza, consistent oven temperature is paramount. The cheese blends used, like the mozzarella, fontina, parmesan, and asiago in Sabatasso’s Four-Cheese pizza, melt at different rates, so even heat distribution is key.
Avoid opening the oven door frequently during baking, as this can cause temperature fluctuations. If you notice uneven melting, gently rotate the pizza halfway through the cooking time.
For optimal results, ensure the pizza is fully cooked – a golden-brown crust and bubbly, melted cheese are indicators of readiness. Allowing the pizza to cool for 2-3 minutes before slicing allows the cheese to set slightly, preventing it from sliding off when cut.
Cooling & Slicing Instructions (2-3 Minute Cooling Period)
After baking your Costco gluten-free pizza to golden-brown perfection, resist the immediate urge to slice and serve! A crucial step for a clean and enjoyable eating experience is allowing a 2-3 minute cooling period. This brief rest allows the melted cheese to firm up slightly, preventing it from sliding off in messy, stringy pieces when you cut into it.
Use a sharp pizza cutter or a large, sharp knife for clean slices. Applying firm, even pressure will ensure a neat cut through both the crispy crust and the cheese.
Serving immediately after cooling will provide the best texture and flavor, maximizing the enjoyment of your perfectly cooked, gluten-free pizza!
Troubleshooting Common Issues (Soggy Crust, Uneven Cooking)
Encountering a soggy crust? Ensure your oven is fully preheated to the recommended temperature (425°F ー 450°F) before placing the pizza inside. Using a baking sheet can sometimes trap moisture; consider placing the pizza directly on the oven rack for increased airflow and crispness. For uneven cooking, rotate the pizza halfway through the baking time to ensure all areas receive equal heat exposure.
If the cheese isn’t melting evenly, try lowering the oven temperature slightly and extending the baking time. Remember, gluten-free crusts can be more delicate, so avoid overbaking.
Consistent preheating and proper rack placement are key to resolving these common issues and achieving pizza perfection!
Safety & Storage
Always handle frozen pizza with care, keeping it refrigerated until ready to cook. Store leftovers promptly in airtight containers for optimal freshness!
Handling Frozen Pizza Safely
Maintaining food safety when dealing with frozen pizzas is paramount. Always ensure the pizza remains frozen during transport from the store to your home; utilize insulated bags if the journey is lengthy. Upon arrival, immediately transfer the pizza to the freezer, maintaining a consistent temperature of 0°F (-18°C) or lower.
Avoid thawing the pizza at room temperature, as this can encourage bacterial growth. If you need to thaw it, do so in the refrigerator overnight. When handling the frozen pizza, be mindful of potential frostbite; avoid prolonged direct contact with your skin. Discard any pizza that shows signs of freezer burn or damage to the packaging. Proper handling not only ensures a delicious meal but also safeguards your health and well-being, especially when dealing with gluten-free options.
Leftover Storage Guidelines
Properly storing leftover Costco gluten-free pizza is crucial for maintaining its quality and ensuring food safety. Allow the pizza to cool completely – approximately 2-3 minutes after slicing – before storing. Transfer leftover slices to an airtight container or tightly wrap them in plastic wrap or aluminum foil.
Refrigerate promptly; leftovers should be consumed within 3-4 days for optimal taste and texture. To reheat, consider using the oven or air fryer to restore some of the original crispness. Avoid prolonged storage, as the gluten-free crust can become soggy. Freezing leftover pizza is also an option; wrap individual slices securely and consume within 2-3 months for best results.
Leave a Reply
You must be logged in to post a comment.