Instant Pot Dutch Oven: A Comprehensive Manual
Welcome! This guide unlocks the full potential of your Instant Pot Dutch oven‚ offering detailed instructions and inspiring recipes for culinary success.
The Instant Pot Dutch oven represents a fantastic fusion of traditional cooking methods with modern convenience. It marries the robust heat retention and even cooking of a classic Dutch oven with the versatility and speed of an Instant Pot. This combination opens up a world of culinary possibilities‚ allowing you to create deeply flavorful dishes with less hands-on time.
This manual is designed to be your comprehensive resource‚ guiding you through everything from understanding the unique features of your Dutch oven to mastering a wide range of recipes. Whether you’re a seasoned chef or a beginner cook‚ we’ll cover essential techniques‚ safety precautions‚ and maintenance tips to ensure you get the most out of this incredible kitchen tool. Prepare to rediscover the joy of slow-cooked perfection and quick‚ flavorful meals!
What is an Instant Pot Dutch Oven?
An Instant Pot Dutch oven isn’t a standalone appliance‚ but rather a specifically designed inner pot for select Instant Pot models. It’s crafted from durable cast iron‚ often coated with enamel‚ and shaped like a traditional Dutch oven – with thick walls and a tight-fitting lid. This design allows for superior heat distribution and retention‚ crucial for even cooking and developing rich flavors.
Unlike the standard stainless steel inner pot‚ the Dutch oven excels at browning‚ searing‚ and maintaining consistent temperatures during prolonged cooking. It effectively transforms your Instant Pot into a versatile tool capable of mimicking the performance of a stovetop Dutch oven‚ while still benefiting from the Instant Pot’s pressure cooking and automated functions. It’s a game-changer for stews‚ braises‚ and even baking!
Benefits of Using an Instant Pot Dutch Oven
Enhanced Browning & Searing: The cast iron construction delivers exceptional heat retention‚ allowing for a beautiful sear on meats and vegetables – something standard stainless steel struggles with.
Superior Heat Distribution: Say goodbye to hot spots! Even heating ensures consistent cooking throughout the entire dish‚ resulting in perfectly cooked meals every time.
Versatility: Expand your Instant Pot’s capabilities beyond pressure cooking. Enjoy slow cooking‚ sautéing‚ braising‚ and even baking within a single pot.
Flavor Development: The cast iron promotes Maillard reaction‚ creating deeper‚ richer flavors in your recipes. Plus‚ it’s naturally non-stick when seasoned properly!
Easy Cleanup: Enameled cast iron is generally dishwasher safe‚ simplifying the cleaning process after a delicious meal.
Understanding Your Instant Pot Dutch Oven
Let’s delve deeper! This section will familiarize you with the unique features and construction of your Instant Pot Dutch oven for optimal use.
Key Components & Parts
Identifying the essentials is crucial. Your Instant Pot Dutch oven comprises several key components working in harmony. The main body‚ typically enameled cast iron‚ provides even heat distribution and retention. A tightly fitting lid is paramount for pressure cooking‚ often featuring a silicone sealing ring. This ring ensures a secure seal‚ building necessary pressure.
You’ll also find handles – usually robust cast iron – for safe maneuvering‚ even when hot. Many models include a knob on the lid for pressure level selection (seal/vent). Inside‚ the cooking pot itself is the workhorse. Some Dutch ovens come with a trivet‚ elevating food above liquid for steaming or preventing sticking. Finally‚ examine the pressure release valve; understanding its function is vital for safe operation. Familiarizing yourself with each part ensures confident and efficient cooking.
Materials: Enameled Cast Iron vs. Traditional Cast Iron
Choosing the right material impacts performance. Instant Pot Dutch ovens primarily come in two forms: enameled and traditional cast iron. Enameled cast iron boasts a porcelain enamel coating‚ preventing rusting and eliminating the need for seasoning. It’s also easier to clean and doesn’t react with acidic foods‚ offering versatility.
Traditional cast iron‚ conversely‚ requires seasoning – a process of baking oil into the pores to create a natural non-stick surface. While demanding more maintenance‚ seasoned cast iron develops a patina over time‚ enhancing its non-stick properties and flavor infusion. It’s incredibly durable and retains heat exceptionally well. However‚ it can rust if not properly cared for and may react with acidic ingredients. Enameled versions are generally preferred for Instant Pot use due to convenience and compatibility.
Size & Capacity Considerations
Selecting the appropriate size is crucial. Instant Pot Dutch ovens typically range from 5 to 7 quarts. A 5-quart model is ideal for smaller households (1-3 people) or side dishes‚ offering quicker heating and easier handling. It’s perfect for soups‚ stews‚ and braising smaller cuts of meat.
A 6 or 7-quart Dutch oven is better suited for families of four or more‚ or for batch cooking. These larger sizes accommodate whole chickens‚ larger roasts‚ and substantial quantities of chili or soup. Consider your typical cooking needs and storage space; Remember that filling the Dutch oven beyond two-thirds capacity can hinder proper pressure cooking. Prioritize a size that balances your requirements with the Instant Pot’s functionality.
Getting Started: Initial Setup & Safety
Preparation is key! Ensure proper setup and familiarize yourself with essential safety guidelines before your first culinary adventure with the Dutch oven.
Initial Seasoning (If Required)
Understanding Seasoning: Not all Instant Pot Dutch ovens require initial seasoning‚ particularly those with a fully enameled coating. However‚ if you have a traditional cast iron version‚ or the manufacturer recommends it‚ seasoning is crucial for creating a naturally non-stick surface and protecting against rust.
The Process: Begin by thoroughly washing the Dutch oven with warm‚ soapy water and drying it completely. Apply a thin‚ even coat of cooking oil (flaxseed‚ canola‚ or vegetable oil work well) to all interior surfaces – including the sides‚ bottom‚ and lid. Wipe off any excess oil with a clean cloth; you want a very light coating‚ not a puddle.
Baking It In: Place the Dutch oven upside down in a preheated oven at 350°F (175°C) for one hour. Place a baking sheet on the rack below to catch any drips. Allow the Dutch oven to cool completely in the oven before use. This process may be repeated 2-3 times for optimal seasoning. A well-seasoned Dutch oven will deepen in color with each use.
Safety Precautions & Best Practices
Handling with Care: Cast iron‚ even enameled‚ is heavy! Always use oven mitts or pot holders when handling a hot Instant Pot Dutch oven to prevent burns. Avoid dropping it‚ as both the pot and the enamel coating can chip or crack.
Pressure Release: When pressure cooking‚ always follow the Instant Pot’s instructions for pressure release – either natural pressure release (NPR) or quick release (QR). Never force the lid open during pressure cooking. Ensure the steam release valve is properly positioned before starting a QR.
Thermal Shock: Avoid drastic temperature changes‚ as this can cause cracking. Never plunge a hot Dutch oven into cold water. Allow it to cool gradually before washing. Use wooden‚ silicone‚ or nylon utensils to avoid scratching the enamel. Always check for chips before each use‚ and discontinue use if damage is present.
Compatible Instant Pot Models
Versatility is Key: While designed for broad compatibility‚ not all Instant Pot models seamlessly accommodate a Dutch oven. Generally‚ 6-quart and 8-quart Instant Pots offer the best fit‚ providing sufficient space around the Dutch oven for proper heating and pressure build-up.
Confirmed Compatibility: Models like the Instant Pot Duo‚ Duo Nova‚ Pro‚ and Max are frequently used with Dutch ovens. However‚ the Instant Pot Pro Plus may require careful monitoring due to its more powerful heating element.
Important Note: Smaller Instant Pot models (3-quart) may not be suitable. Always ensure the Dutch oven sits securely within the inner pot without touching the heating element directly. Refer to your Instant Pot’s manual for specific guidelines and weight limitations. Using an incompatible model could void your warranty or pose a safety risk.

Cooking with Your Instant Pot Dutch Oven
Unlock Flavor: Experience enhanced cooking with your Dutch oven! It seamlessly integrates with the Instant Pot’s functions for incredible results.
Pressure Cooking Basics
Mastering Pressure: Utilizing the pressure cooking function with your Instant Pot Dutch oven dramatically reduces cooking times while intensifying flavors. Ensure the lid is securely locked and the pressure valve is set to ‘Sealing’ before initiating the pressure cook cycle.
Always add sufficient liquid – at least one cup – to create steam‚ essential for pressure build-up. Remember the ‘10-minute rule’ for natural pressure release (NPR) for most recipes‚ allowing the pressure to dissipate gradually.
For quicker release‚ use the ‘Quick Release’ method‚ carefully venting steam away from your face and hands. Adjust cooking times based on ingredient density; tougher cuts of meat benefit from longer pressure cooking durations. Familiarize yourself with your Instant Pot’s pressure level settings (High/Low) to optimize results for different dishes.
Consistent practice will build confidence and unlock the full potential of pressure cooking with your versatile Dutch oven!
Sautéing & Browning Functions
Building Flavor from the Start: The Sauté function on your Instant Pot Dutch oven is ideal for developing rich‚ complex flavors before pressure cooking or slow cooking. Ensure the inner pot is securely placed within the Dutch oven before activating the function.
Use a moderate heat setting to avoid scorching‚ and add oil or fat as needed. Browning meats before pressure cooking seals in juices and adds depth. Deglaze the pot after sautéing by adding liquid and scraping up any browned bits from the bottom – this prevents the ‘Burn’ error during pressure cooking.
The Dutch oven’s even heat distribution ensures consistent browning. Remember to monitor the sautéing process closely‚ as it doesn’t automatically shut off. Experiment with different sauté times to achieve your desired level of caramelization and flavor development.
This function is a cornerstone of layered flavor creation!
Slow Cooking Capabilities
Low and Slow Perfection: Your Instant Pot Dutch oven excels at slow cooking‚ offering a convenient alternative to traditional slow cookers. The thick cast iron ensures even heat distribution and excellent temperature retention‚ resulting in tender‚ flavorful dishes.
When slow cooking‚ use the ‘Less’ or ‘Normal’ heat setting‚ depending on your recipe’s requirements. Remember that the Dutch oven retains heat very well‚ so cooking times may be slightly shorter than with a conventional slow cooker. Always start with the ‘Less’ setting and adjust if needed.
The lid creates a tight seal‚ minimizing moisture loss and keeping your food incredibly moist. Avoid lifting the lid frequently during slow cooking‚ as this releases heat and extends cooking time. This feature is perfect for hearty stews‚ pulled meats‚ and comforting casseroles.

Recipes & Usage Examples
Explore culinary possibilities! Discover delicious recipes – from comforting stews to delightful desserts – showcasing the versatility of your Instant Pot Dutch oven.
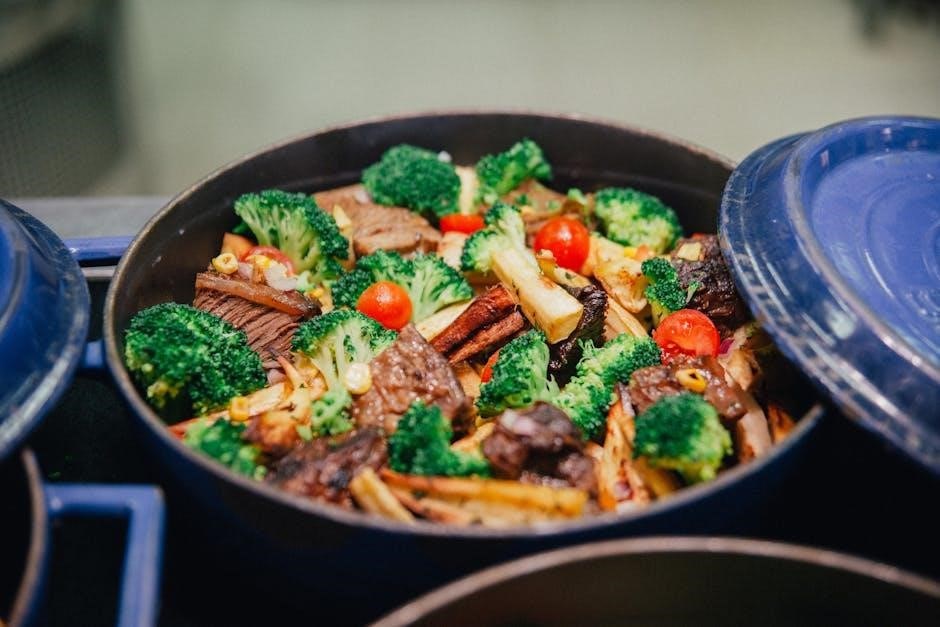
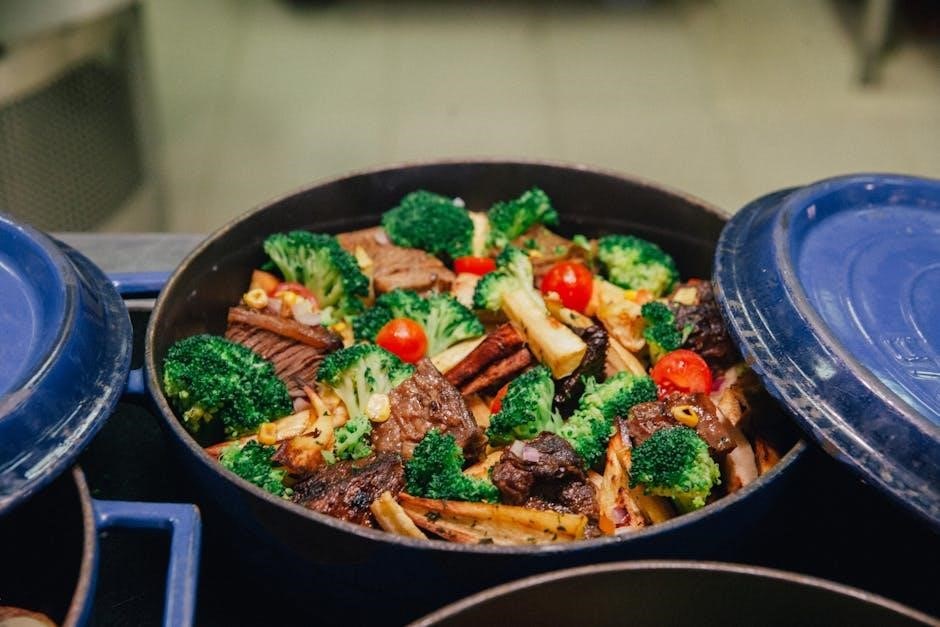
Classic Stews & Braises
The heart of comfort cooking! Your Instant Pot Dutch oven excels at transforming tough cuts of meat into incredibly tender‚ flavorful stews and braises. The even heat distribution and sealed environment are perfect for long‚ slow cooking‚ resulting in fall-off-the-bone textures and deeply developed flavors.

Consider a classic Beef Bourguignon‚ where the Dutch oven’s ability to maintain consistent temperature ensures the beef becomes meltingly tender. Or‚ explore a hearty Irish Stew‚ benefiting from the pot’s excellent heat retention. Braising short ribs is another triumph‚ yielding succulent‚ rich results with minimal effort.
Don’t be afraid to experiment with different liquids – wine‚ beer‚ broth – and aromatics to create your signature stew. The heavy lid locks in moisture‚ preventing evaporation and concentrating the flavors. Remember to utilize the sauté function for browning the meat before braising for an extra layer of complexity!
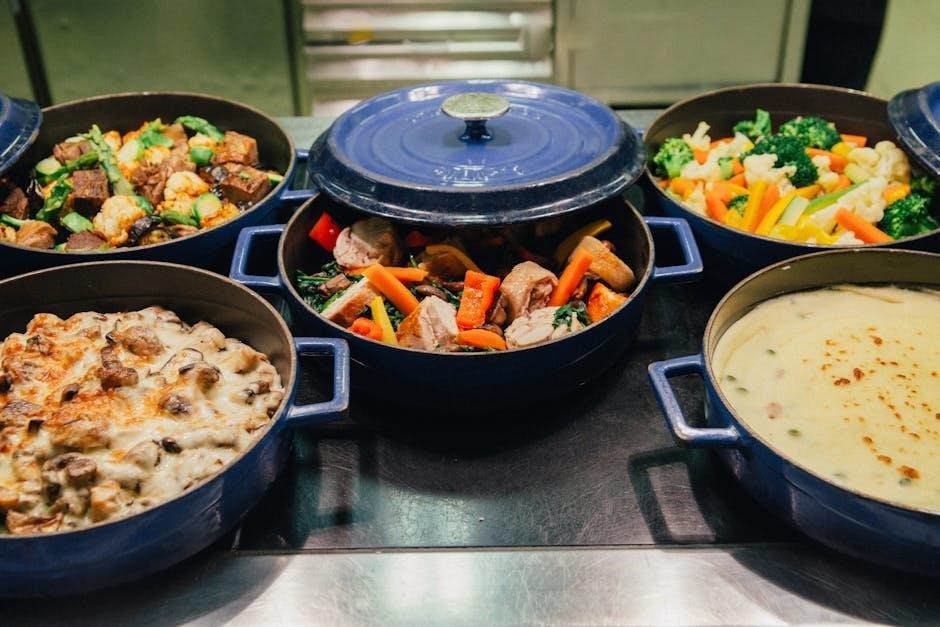
Soups & Chilis
From creamy bisques to robust chilis‚ the Instant Pot Dutch oven is a soup and chili-making powerhouse! Its generous capacity easily accommodates large batches‚ perfect for meal prepping or feeding a crowd. The even heating prevents scorching‚ ensuring a smooth‚ consistent texture throughout.
Imagine a velvety Tomato Soup‚ simmered to perfection‚ or a spicy Chicken Tortilla Soup brimming with flavor. For chili‚ the Dutch oven’s weight and heat retention allow for hours of slow simmering‚ melding the spices and tenderizing the meat.
Utilize the sauté function to bloom spices and brown ground meat directly in the pot‚ building a flavorful base. The tight-fitting lid minimizes evaporation‚ concentrating the flavors. Remember to carefully monitor pressure release for soups containing dairy to prevent scalding. Enjoy endless soup and chili possibilities!
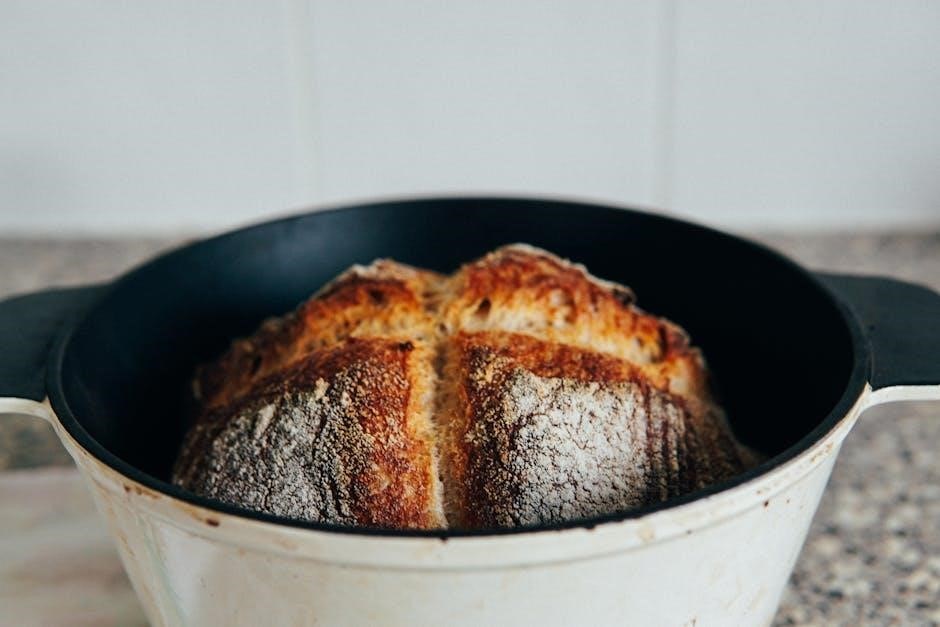
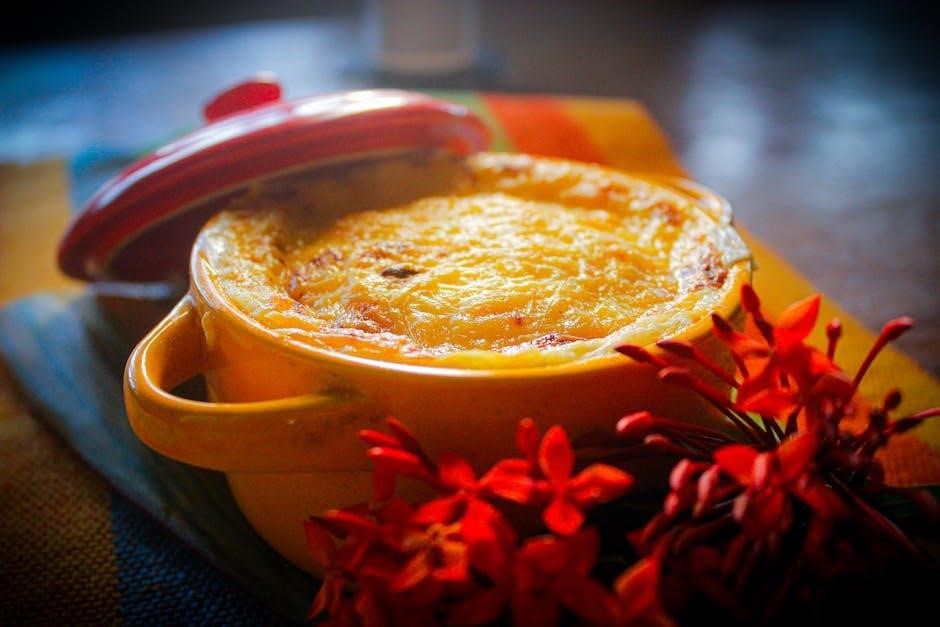
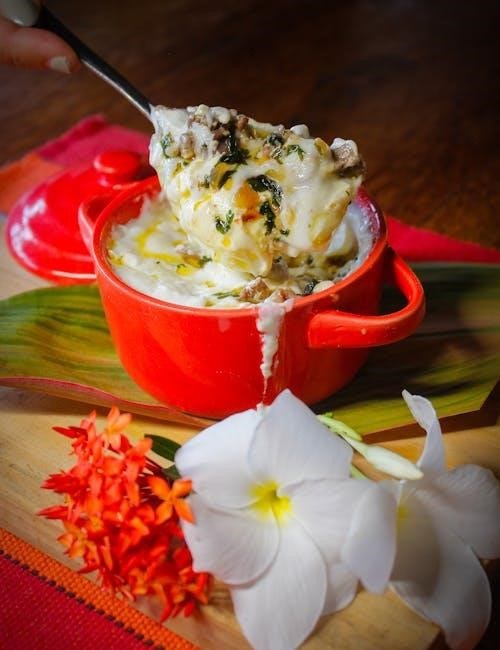
Desserts & Baking (Yes‚ Really!)
Believe it or not‚ your Instant Pot Dutch oven isn’t just for savory dishes! It excels at creating surprisingly delightful desserts and baked goods. The even heat distribution and moisture retention are key to tender cakes‚ cobblers‚ and even bread puddings.
Think about a warm Apple Cobbler with a golden‚ bubbly topping‚ or a decadent Chocolate Lava Cake with a molten center. The Dutch oven’s lid traps steam‚ creating a moist environment ideal for baking. While it won’t achieve a crispy crust like a traditional oven‚ it delivers incredible flavor and texture.
Lower cooking times and reduced energy consumption are added bonuses. Remember to use trivets to prevent sticking and adjust recipes accordingly‚ as baking times will differ from conventional methods. Explore the sweet side – you’ll be amazed!

Care & Maintenance
Preserve your investment! Proper cleaning‚ storage‚ and addressing minor issues will ensure your Instant Pot Dutch oven lasts for generations of delicious meals.
Cleaning Your Instant Pot Dutch Oven
Gentle is key! Avoid abrasive cleaners and scouring pads that can damage the enamel coating. For routine cleaning‚ warm water and a soft sponge are usually sufficient. Stubborn food residue can be loosened by simmering water with a tablespoon of baking soda for a few minutes‚ then gently scraping.
Avoid temperature shock! Never plunge a hot Dutch oven into cold water‚ as this can cause cracking. Allow it to cool completely before washing. Handwashing is generally recommended to prolong the life of the enamel‚ though many are dishwasher safe – check your manufacturer’s instructions.
Addressing Stains: For persistent stains‚ create a paste of baking soda and water‚ apply to the stain‚ let sit for 30 minutes‚ and gently scrub. Avoid using harsh chemicals like bleach. Thoroughly rinse and dry after cleaning to prevent rust.
Storage Recommendations
Protecting your investment! Proper storage extends the life of your Instant Pot Dutch oven. Ensure it’s completely dry before storing to prevent rust formation‚ especially for uncoated cast iron versions. If stacking‚ place a soft cloth or paper towel between the Dutch oven and other cookware to prevent chipping of the enamel.
Lid Storage: Store the lid separately to allow for air circulation and prevent moisture buildup. Consider hanging it or placing it slightly ajar. Avoid storing heavy items on top of the lid‚ as this could cause damage.
Long-Term Storage: For extended periods of disuse‚ lightly coat the interior with oil to prevent rust. Store in a dry‚ well-ventilated area. Avoid storing in damp basements or outdoors.
Troubleshooting Common Issues
Addressing potential problems! If food sticks‚ ensure sufficient liquid is used and deglaze the pot after sautéing. For stubborn residue‚ simmer water with baking soda. Chipping of enamel‚ though rare‚ can occur with sudden temperature changes – avoid thermal shock.
Rust Concerns: If rust appears on uncoated cast iron‚ scrub it off with steel wool‚ then re-season. A warped bottom usually indicates uneven heating; avoid high heat and use a diffuser. A loose lid can often be resolved by ensuring proper alignment.
Pressure Cooking Issues: If pressure isn’t building‚ check the sealing ring and ensure the vent is properly sealed. Always consult the Instant Pot’s manual for specific error codes and solutions.
Advanced Techniques & Tips
Elevate your cooking! Mastering these techniques unlocks deeper flavors and textures‚ transforming simple recipes into gourmet experiences with your Dutch oven.
Layering Flavors for Optimal Results
Building depth of flavor is crucial when using your Instant Pot Dutch oven. Don’t rush the initial stages! Begin by properly browning your meats and vegetables – this Maillard reaction creates a rich‚ savory base.
Next‚ consider the order of adding aromatics. Sauté onions‚ garlic‚ and ginger before adding spices to bloom them and release their full fragrance. Deglaze the pot with wine or broth after browning‚ scraping up those flavorful browned bits (fond) – this is liquid gold!
Introduce herbs in stages. Hearty herbs like rosemary and thyme can go in early‚ while delicate herbs like parsley and cilantro should be added towards the end of cooking to preserve their freshness. Finally‚ a finishing touch of acid – a squeeze of lemon juice or a splash of vinegar – brightens the flavors and adds complexity. Remember‚ flavor builds with each step!
Adjusting Cooking Times for Different Ingredients
Mastering timing is key to perfectly cooked dishes in your Instant Pot Dutch oven. Dense proteins like beef chuck require longer cooking times – typically 60-90 minutes on high pressure – to become tender. Conversely‚ poultry and fish cook much faster‚ often within 15-30 minutes.
Vegetables vary greatly. Root vegetables (potatoes‚ carrots) need more time than leafy greens (spinach‚ kale). Consider adding quicker-cooking vegetables later in the process‚ or pressure cooking them separately to prevent mushiness;
Altitude also impacts cooking times; higher altitudes require increased pressure and longer durations. Always consult reliable recipes as a starting point‚ but don’t be afraid to experiment and adjust based on your ingredients and preferences. A little practice will help you become a timing pro!
Maximizing the Sauté Function
The sauté function on your Instant Pot Dutch oven is a powerhouse for building flavor. Unlike traditional stovetop sautéing‚ it maintains consistent heat‚ preventing scorching. For optimal results‚ use enough oil or fat to coat the bottom of the pot.
Don’t overcrowd the pot; work in batches if necessary to ensure even browning. Deglaze the pot after sautéing – add liquid (wine‚ broth) and scrape up any browned bits from the bottom. These flavorful fond particles add depth to your final dish.
Remember the sauté function heats up gradually. Allow sufficient time for the pot to reach the desired temperature before adding ingredients. Utilize the “Less” and “More” buttons to fine-tune the heat level for delicate items or faster browning.
Leave a Reply
You must be logged in to post a comment.