Colorbond wall cladding is a popular choice for exterior and interior applications, offering durable, weather-resistant, and low-maintenance solutions. Made from high-quality pre-painted steel, it enhances both aesthetics and functionality, providing a modern look while withstanding harsh conditions. Perfect for homeowners and builders seeking long-lasting, versatile cladding options.
What is Colorbond Wall Cladding?
Colorbond wall cladding is a durable, pre-painted steel material designed for exterior and interior applications. Manufactured by BlueScope Steel, it combines strength, weather resistance, and aesthetic appeal. The cladding is made from high-quality steel coated with a corrosion-resistant layer and finished with a paint system for long-lasting color retention. It is lightweight, easy to install, and suitable for various climates. Colorbond cladding is widely used for walls, fences, and roofs, offering a modern and versatile solution for enhancing both functionality and visual appeal in residential and commercial projects.
Advantages of Colorbond Wall Cladding
Colorbond wall cladding offers numerous benefits, including exceptional durability and resistance to weather, fire, and pests. It is lightweight, making installation easier and faster. The pre-painted finish ensures minimal maintenance, with no need for frequent painting. Colorbond cladding is also energy-efficient, helping regulate temperatures. Its sleek, modern appearance enhances any structure’s aesthetics. Additionally, it is environmentally friendly, being fully recyclable. These advantages make Colorbond cladding a cost-effective, long-lasting solution ideal for various architectural designs and climatic conditions.
Scope of the Installation Guide
This guide provides a comprehensive overview of Colorbond wall cladding installation, covering essential steps from preparation to final touches. It includes detailed instructions on assessing sites, tools required, and safety measures. The guide also addresses troubleshooting common issues, maintaining cladding, and ensuring weatherproofing. Designed for both professionals and DIY enthusiasts, it offers practical advice tailored to Australian conditions. By following this guide, you can achieve a durable, aesthetically pleasing, and long-lasting Colorbond wall cladding installation.
Preparation for Installation
Preparation involves assessing site conditions, gathering necessary tools, and setting up safety equipment. Ensure the area is clear and weather conditions are suitable for installation.
Assessing the Site and Weather Conditions
Before installation, evaluate the site for structural integrity and obstructions; Check weather conditions to avoid rain, strong winds, or extreme temperatures. Ensure the area is safe, clear, and level. Verify that all necessary tools and materials are available. Assessing these factors ensures a smooth and safe installation process; Always consult local building codes and manufacturer guidelines for specific requirements. Proper site preparation is crucial for a successful Colorbond wall cladding project.
Tools and Materials Required
To install Colorbond wall cladding, gather essential tools and materials. These include hex head screws, a drill with screwdriver bits, measuring tape, spirit level, pencil, safety gloves, and a ladder. Ensure you have weatherproof sealants and appropriate flashings for a watertight seal. Also, stock up on Colorbond panels, mounting brackets, and fasteners. Having all necessary items on hand ensures efficiency and avoids delays during installation. Always refer to the manufacturer’s recommendations for specific requirements.
Setting Up Safety Equipment
Before starting, ensure all safety equipment is in place. Wear hard hats, safety glasses, gloves, and steel-capped boots. Set up scaffolding securely and use harnesses for fall protection. Install safety barriers and warning signs around the site. Ensure ladders are stable and anchored. Keep fire extinguishers nearby and maintain clear access paths. Regularly inspect equipment for damage. Adhere to local safety regulations and conduct a safety briefing with the team. Proper setup prevents accidents and ensures a safe working environment throughout the installation process.
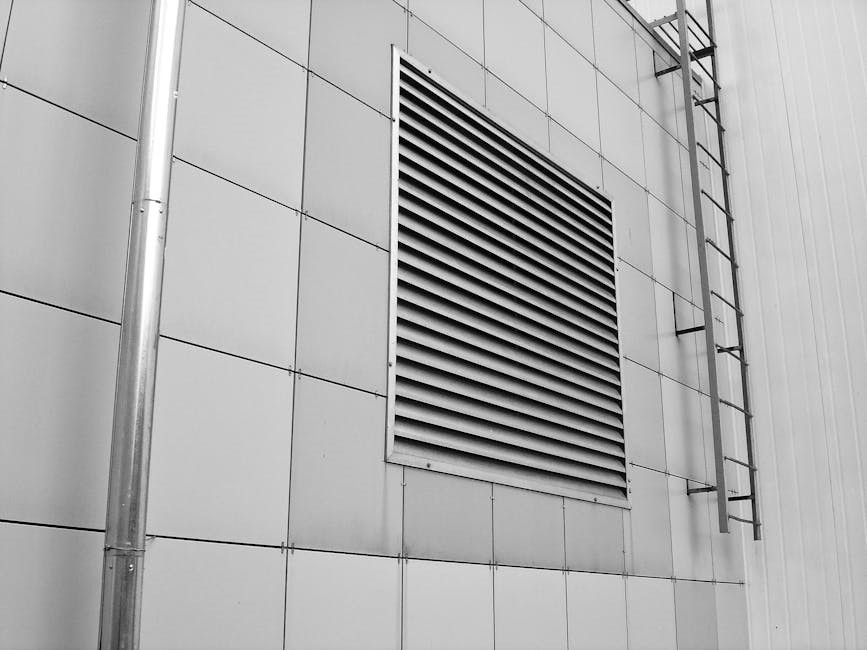
Understanding Colorbond Wall Cladding Profiles
Colorbond wall cladding profiles include corrugated, smooth, and specialty designs, offering versatility for various architectural styles. Each profile provides unique aesthetic and functional benefits, ensuring durability and style.
Corrugated Colorbond Sheets
Corrugated Colorbond sheets are a popular choice for wall cladding, offering a durable and weather-resistant solution. Their ribbed profile provides excellent strength and structural integrity, making them ideal for both exterior and interior applications. These sheets are easy to install using hex head screws, with a recommended side lap of one and a half corrugations for secure fixing. Available in various colors, corrugated sheets add a rustic, textured look to walls, making them suitable for modern and traditional designs alike. Their low-maintenance nature ensures long-lasting performance.
Smooth Colorbond Sheets
Smooth Colorbond sheets offer a sleek, modern alternative to corrugated profiles, providing a clean and uniform appearance. Ideal for those seeking a contemporary look, these sheets are durable and weather-resistant, making them suitable for both exterior and interior applications. Installation involves securing them to a smooth surface, often using hidden fasteners to maintain their aesthetic appeal. Smooth sheets are low-maintenance and available in various colors, ensuring they complement any design while offering long-lasting protection against the elements.
Other Specialty Profiles
Beyond corrugated and smooth sheets, Colorbond offers a range of specialty profiles tailored for specific design needs. These include mini-corrugated, troughed, and panel profiles, each offering unique aesthetic and functional benefits. Mini-corrugated profiles provide a subtle texture, while troughed profiles add depth and visual interest. These specialty options are durable, weatherproof, and designed to enhance architectural versatility, allowing for customization to suit various projects, from modern homes to commercial buildings, ensuring a perfect blend of style and durability in any setting.
Wall Preparation
Wall preparation involves inspecting, cleaning, and repairing surfaces to ensure a smooth installation. Damaged areas must be fixed, and surfaces should be marked accurately for panel placement.
Inspecting and Cleaning the Wall Surface
Inspect the wall surface for cracks, dampness, or structural damage. Clean the area thoroughly, removing dirt, oil, or old adhesives, to ensure proper cladding adhesion. Use a wire brush or pressure washer for stubborn stains. Check for loose or crumbling mortar and repair it before proceeding. Ensure the surface is dry and free from debris to create a stable base for the Colorbond panels. This step is crucial for a secure and long-lasting installation, preventing future issues like water damage or panel detachment.
Repairing Damaged or Uneven Surfaces
Assess the wall for cracks, holes, or uneven areas. Use a patching compound to fill gaps, smoothing with a trowel. Allow the compound to dry completely. Sand uneven surfaces to create a level base. For structural damage, consult a professional. Once repaired, ensure the surface is even and secure. This step ensures proper cladding adhesion and prevents installation issues. A well-prepared surface is essential for a smooth, professional finish.
Marking the Wall for Panel Installation
Begin by measuring the wall dimensions to determine panel placement. Use a pencil to mark the starting point, ensuring alignment with the cladding design. Snap chalk lines to guide panel installation, maintaining even spacing. Double-check measurements for accuracy. Mark electrical outlets or obstructions to avoid interference. Use a level to ensure all marks are straight and plumb. This step ensures panels fit seamlessly, aligning with the desired aesthetic and structural requirements. Proper marking is crucial for a professional finish.

Installing Colorbond Wall Cladding
Installing Colorbond wall cladding involves securing pre-painted steel panels to walls, ensuring a durable and weather-resistant finish. Follow manufacturer guidelines for optimal results.
Fixing the First Panel
The first panel sets the foundation for a successful installation. Align it with the wall edge, ensuring it is straight using a spirit level. Secure the panel with screws, starting from the bottom and working upwards to maintain stability. Ensure screw spacing adheres to manufacturer guidelines, typically 300-400mm apart. Check the panel fit at the top; if cutting is required, use a saw or tin snips. Properly fixing the first panel is crucial for achieving a seamless and professional finish throughout the cladding process.
Securing Subsequent Panels
After fixing the first panel, subsequent panels are secured by overlapping them according to the manufacturer’s guidelines, typically 25-50mm. Align each panel with the previous one, ensuring the corrugations or profile matches perfectly. Use screws to fasten panels at recommended intervals, starting from the bottom and working upwards to prevent water ingress. Ensure panels are straight and evenly spaced using a spirit level. Proper alignment and secure fastening are critical for maintaining structural integrity and achieving a professional finish.
Aligning and Spacing Panels
Accurate alignment and spacing of panels are crucial for a seamless and professional finish. Use a spirit level and string line to ensure panels are straight and evenly spaced. Overlap panels by 25-50mm as recommended. Maintain consistent spacing between panels, typically 5-10mm, to allow for expansion. Secure panels firmly to prevent movement. After installing each panel, check alignment to avoid misplacement. Proper spacing ensures durability and a seamless appearance;
Fixing Panels at Corners and Edges
When fixing panels at corners and edges, ensure a snug fit to maintain structural integrity and appearance. Overlap panels by 25mm at corners, securely fastening with screws. Use flashing at edges to prevent water ingress. Align panels precisely, checking for proper fit before securing. Apply sealant if required for added weatherproofing. Ensure panels are tightly fastened to avoid gaps. Properly finished corners and edges enhance durability and visual appeal, safeguarding against weather damage.
Flashing and Weatherproofing
Flashing and weatherproofing are essential for preventing water infiltration and ensuring long-term durability. Properly installed flashings protect edges and joints, enhancing structural integrity and visual appeal.
Installing Flashings at Gables and Valleys
At gables and valleys, flashings are critical to prevent water ingress. Cut flashings to size, ensuring they fit snugly over peaks and troughs. Secure them with corrosion-resistant screws, overlapping at joints. Apply sealant for extra protection. Ensure flashings are tightly fitted to avoid gaps, especially in areas prone to heavy rain or wind. Proper installation here is vital for maintaining weather tightness and the overall integrity of the cladding system.
Ensuring Weather Tightness
Weather tightness is achieved by sealing all gaps and joints in the cladding system. Apply high-quality sealants around flashings, panel edges, and corners. Ensure panels are securely fastened and evenly aligned to prevent water seepage. Regularly inspect for loose screws or damaged sealants. Test weather tightness by spraying water during installation to identify and address any leaks promptly. Proper sealing ensures long-term durability and protects the structure from moisture damage, maintaining the integrity of the Colorbond cladding system;
Finishing Touches
Trim excess material, paint if desired, and inspect the cladding for a polished look. Address any imperfections to ensure a professional and flawless finish.
Trimming Excess Material
Use tin snips or a saw to neatly trim excess Colorbond material, ensuring clean edges. Precision is key to avoid unevenness. Sand or file sharp edges for safety and a polished appearance. This step prevents damage during finishing processes like painting or sealing. Proper trimming enhances the overall aesthetic and ensures panels fit seamlessly. Regularly inspect cut edges to maintain structural integrity and weatherproofing effectiveness. Trimming excess material is a crucial final step before completing the installation.
Painting and Touch-ups
Colorbond cladding is pre-painted, but touch-ups may be needed for scratches or cuts. Use Colorbond-specific paint for consistency. Ensure surfaces are clean and dry before painting. Lightly sand damaged areas to smooth edges. Apply paint evenly, allowing it to dry completely between coats. Avoid painting in direct sunlight or wet conditions. For minor scratches, match the color precisely to maintain the cladding’s appearance. Regular touch-ups prevent rust and extend the material’s lifespan, keeping it looking fresh and vibrant over time.
Final Inspection
A thorough final inspection ensures the Colorbond cladding is correctly installed and meets quality standards. Check all panels for proper alignment, secure fasteners, and weatherproofing integrity. Verify that flashings are correctly fitted at gables, valleys, and edges. Ensure surfaces are clean and free from debris. Inspect corners and edges for tight seals and even spacing. Review the entire installation to confirm it aligns with manufacturer guidelines and local building codes. Document any issues for immediate resolution, ensuring the cladding performs optimally and maintains its aesthetic appeal for years to come.
Troubleshooting Common Issues
Common issues with Colorbond cladding include panel misalignment, leaks, and fastener looseness. Inspect for gaps, weatherproofing failures, or damage. Address problems promptly to prevent further damage.
Addressing Panel Misalignment
Panel misalignment is a common issue during Colorbond cladding installation. It often occurs due to incorrect marking or uneven wall surfaces. To fix this, start by checking the wall markings for accuracy. Ensure the panels are aligned with the designated starting points using a spirit level. If misaligned, loosen the fixing screws and gently adjust the panel into the correct position. Tighten the screws firmly but avoid over-tightening, which can damage the material. For severe misalignment, remove the panel and reinstall it, ensuring proper spacing and alignment. Addressing this issue early prevents further complications and ensures a smooth installation process.
Fixing Leaks and Water Damage
Leaks and water damage in Colorbond cladding can occur due to improper flashing or sealant failure. Inspect the affected area to identify the source of the leak. Clean debris from flashings and ensure they are securely fastened. Apply a high-quality sealant to gaps or cracks, following manufacturer instructions. For severe water damage, remove and replace the damaged panels, ensuring proper alignment and weatherproofing. Regular inspections and timely repairs are crucial to prevent further damage and maintain the structural integrity of the cladding system.
Maintenance and Care
Regular cleaning and inspections are essential to maintain Colorbond cladding’s durability. Ensure all weather-tight seals are intact to prevent water damage and extend its lifespan.
Cleaning Colorbond Cladding
Regular cleaning is essential to maintain the appearance and durability of Colorbond cladding. Use a soft sponge or brush with mild detergent and water to gently remove dirt and grime. Avoid harsh chemicals, abrasive cleaners, and high-pressure washes, as they can damage the pre-painted finish. Hose down the cladding first to loosen debris, then apply the cleaning solution, and rinse thoroughly. Cleaning should be done in shaded areas to prevent soap from drying onto the surface. For stubborn stains, a slightly stronger solution may be necessary, but always test a small area first to ensure compatibility. Regular maintenance prevents the buildup of mold and mildew, ensuring the cladding remains in optimal condition. Following these steps will help extend the lifespan of your Colorbond cladding and keep it looking its best.
Inspecting for Damage
Regularly inspect Colorbond cladding for signs of damage, such as dents, scratches, or rust. Check for loose or missing fasteners and gaps between panels. Weather-related damage, like hail dents or fading, should be addressed promptly. Inspect after severe weather events or annually as part of maintenance. Use a ladder and gloves for safe access. Minor scratches can be touched up with matching paint, but deeper damage may require professional repair. Early detection prevents further deterioration and ensures the cladding remains structurally sound and visually appealing. Schedule inspections to maintain warranty conditions and long-term performance.
Safety Considerations
Always wear protective gear like gloves, safety glasses, and a hard hat. Ensure proper ladder safety and secure the structure to support weight. Follow electrical safety protocols and manufacturer guidelines to minimize risks during installation and maintenance.
Working at Heights
When installing Colorbond wall cladding, working at heights requires meticulous safety measures. Ensure ladders and scaffolding are stable and meet safety standards. Always maintain three points of contact—two hands and one foot, or two feet and one hand. Use harnesses and safety nets where possible; Never lean over edges and always have a spotter. Regularly inspect equipment for damage or wear. Adhere to local regulations and manufacturer guidelines to ensure a safe working environment at heights.
Handling Sharp Edges and Tools
Working with Colorbond wall cladding involves handling sharp edges and tools, requiring utmost care to prevent injuries. Always wear protective gloves, safety glasses, and a dust mask when cutting or drilling materials. Use tools like utility knives and screwdrivers with precision, ensuring proper grip and control. Regularly inspect tools for damage and maintain them according to manufacturer guidelines. Store sharp objects securely and dispose of scrap material safely. Prioritize hand safety to avoid cuts and ensure smooth installation progress. Follow safety protocols to minimize risks associated with sharp tools and materials.
Warranty and Supplier Support
Colorbond wall cladding typically comes with comprehensive manufacturer warranties, ensuring durability and performance. Suppliers offer dedicated support, including technical assistance and replacement options, to address any installation or product-related concerns.
Understanding Manufacturer Warranties
Manufacturer warranties for Colorbond wall cladding typically range from 20 to 30 years, depending on the product and conditions. These warranties cover material durability, weather resistance, and color retention, ensuring long-term performance. Proper installation and adherence to manufacturer guidelines are essential to maintain warranty validity. Environmental factors and improper handling can void the warranty. It’s crucial to register the product and follow maintenance recommendations to uphold coverage. Understanding these terms ensures peace of mind and protects your investment in Colorbond cladding.
Case Studies and Examples
A commercial building in Sydney used Colorbond cladding for its façade, showcasing durability and modern aesthetics, withstanding harsh coastal conditions effectively while reducing maintenance needs.
Successful Colorbond Cladding Projects
Several successful projects highlight the versatility and durability of Colorbond wall cladding. In a coastal residential renovation, Colorbond sheets provided a sleek, modern exterior while resisting saltwater corrosion. A commercial building in Melbourne utilized Colorbond cladding for its façade, achieving a striking, contemporary design that withstood harsh weather conditions. Additionally, a school in regional Australia applied Colorbond cladding to create a durable, low-maintenance exterior that aligns with its functional needs. These projects demonstrate how Colorbond cladding enhances both aesthetics and performance in diverse settings.
Colorbond wall cladding installation is a rewarding project that enhances both the functionality and aesthetics of a building. By following this guide, you can achieve professional results, ensuring durability and weather resistance. Proper preparation, precise installation, and regular maintenance are key to maximizing the lifespan of your cladding. Whether for residential or commercial use, Colorbond cladding offers a versatile and long-lasting solution. With the right tools and techniques, you can successfully transform your space, enjoying the benefits of a modern, low-maintenance exterior for years to come.
Leave a Reply
You must be logged in to post a comment.